How to Assemble Your Hiking Poles
Quick Guide
Ready to hit the trail? Before you conquer the hills, let's get your hiking poles set up in just a few quick and easy steps. No tools, no stress — just a smooth setup so you can get outdoors faster.

Step-by-Step Instructions
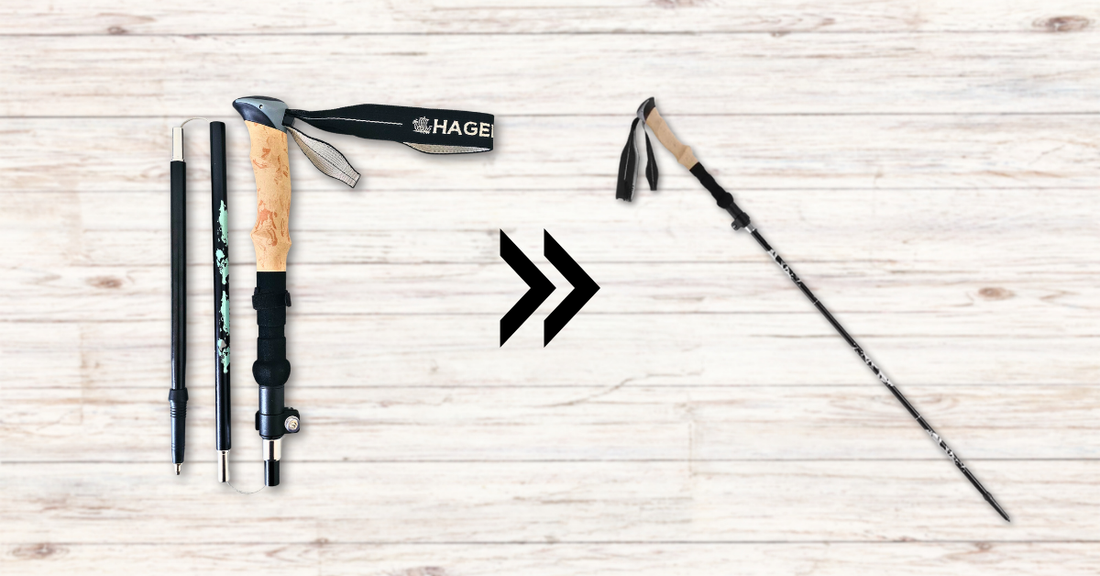
1. Remove the poles from the protective bag
Gently take your poles out of their travel pouch — they’re eager to stretch their legs!
2. Fully extend each pole
Unfold each section until the pole is straight and firm. You’re halfway there.
3. Find the inner section marked with “PULL”
Inside the main shaft, you’ll see a slim section labeled PULL ➜. That’s your cue.
4. Pull until you see the lock icon 🔒
Keep pulling gently — once the padlock symbol appears, you're getting close.
5. Keep going until the safety button pops out
Just past the lock icon, you’ll feel a small button pop — that's your safety lock snapping into place.
6. Listen for the “click”
Click! That satisfying sound means your pole is safely locked and trail-ready.
7. Check the image below for a quick visual

Once everything’s locked in place, adjust the height up to 125 cm to match your stride using the flip-lock system.
